Saturday, December 22, 2018

Cupped Wings


My daughter and I had planned to hunt in Idaho for elk last October but the things fell off the rails on acquiring the right permit and the opportunity went south. Since we each now had an general license maybe we could go to Idaho anyway and hunt waterfowl ? What with school, writing applications for college and her weekend work schedule we left the Cache Valley right after her last class let out on a Friday afternoon. Four hours later found us pulling into a friends driveway. Pleasantries were exchanged as we caught up on family events, Lexi tried on waders for the first time as other gear got sorted. We finally hit the sack late into the evening. The weatherman was predicting the dawn temps to be in the teens. I wondered if I'd brought enough kit.


The alarm went off and we began the ritual of dressing for success in a marsh. Looking like a crew from a Duck Dynasty episode we walked out the door.  Dan's lab was biting at the bit to get into the dog box buried among a pile of decoys laid in the truck bed. Snacks, shells, licenses, calls, check! if we'd forgot it we didn't need it.


The ride was short as was the walk to a sheltered pond off the main course of the river.  It had been many years since I had hunted waterfowl which earlier in my life was a serious addiction. So I got out of the way as Dan and his son Nate began to set a string of deeks in the pond. Every serious duck hunter has their own idea of the perfect size and shape of their spread, Dan and Nate were no different. Wind direction was considered as was every other detail in deception planned for that morning. Light from the east was just beginning to silhouette the mountain peaks when birds could be seen and heard overhead. Many called out of the gloom while others piled into the decoy spread without a hint caution. We still had 15 minutes to go before legal shooting light so we just stood quietly as the ducks whistled past above us or dropped into the pond.

We weren't in a blind this morning instead standing in the head high cat tails.  Finally Nate gave the word for us to spread out along the shore line. Dan finally whispered " it's time" and everyone loaded a shotgun but me, I had come to watch.

I had patterned my daughters Beretta days before, changing choke tubes and loads while shooting into a pattern paper. All the 3 " shell's cycled at the range and I finally settled on Federal Black Cloud # 2 steel with the modified choke tube. Once we got into the marsh the Beretta balked and the entire morning my daughter had to use a single shot by default. Dan at some point said "it's a shame we don't know a gunsmith" I winced, everyone else laughed, even the dog smirked but Lexi never skipped a beat and just tried to make the first shot count.

She missed more than she hit at first and despite the noise the ducks continued to pile in. The lab was earning her pay and giving my daughter quite a show on how you properly retrieve. For some reason I'd been given a call as we left the house and joined in with Nate and Dan as big flight passed by then veered south frantically as I joined in. Dan rose out of the reeds and said "you might want to stick with the chuckle for now" Nate could be heard stifling a laugh off to my left hidden by the reeds.


Lexi had never shot at an incoming clay target and it took awhile for her to work out the geometry involved. But I do recall the first mallard she connected with, barreling in out of the east as if possessed finally cupping his wings to then flare to the left as Lexi stood up to shoot, the drake folded then lost its grip with the sky. Even Remi looked surprised and quickly retrieved the green head. The birds kept coming steadily and within an hour Dan and Nate were close enough to their limits that we had to stop and count the birds.


Nate was now done at seven Dan was one bird away and Lexi had four at her feet. Nate gathered up his birds and headed off to meet other friends on the river to fish while we stuck it out awhile longer. Dan hit and sailed a bird that dropped some 300 yards away. He and Remi struck out to try and retrieve it.


Lexi and I called as birds continued to swing by for a look and two more were quickly taken giving her six. Dan walked back into view holding the recovered mallard and said "I'm done".  It was then that Lexi said "six is enough for me, lets head in for breakfast". Dan countered "Its early Lexi, the birds are flying strong we can wait until you limit". All smiles she replied "no Dan really, I'm good".

So we gathered up the deeks, picked up our empties, policed the scene and walked to the truck. The birds had to be attended to, breakfast was made and the numbed fingers and toes slowly returned to room temperature. I've had some pretty memorable days hunting waterfowl and this one ranks among one of the best. Close friends, a good dog and the bounty of wild game to enjoy later at the table. Dan, Patty, Nate and Remi you're the best, thank you.


Thursday, December 20, 2018

A Defiant Shrike


Here are a few pics of a recent project that included the use of a Shrike 700 Stock.  The heart of the project was based on a Defiant Falkon action that had been assembled by Hawk Hill Custom (www.hawkhillcustom.com) with one of their barrels. The stainless barrel was chambered for 260 Remington. The barreled action was originally stocked in a Boyds Laminated stock and reported to shoot very well.


Hawk Hill also installed and modified the Sunny Hill floor plate and trigger bow assembly to allow the Jewell Trigger unit to fit correctly. The Shrike stock was installed by the owner during a 4 day tutorial visit to the my shop to learn the process. The stock was made with a Carbon Fiber Edge Shell and a standard fiber-glass fill.


Consequently the owner has now decided not to get into hobby Gun Smithing after retirement but instead take up a less stressful past time like taming lions or capping burning oil wells. 

When using the Shrike stock I've found it beneficial to use a longer set of trigger guard screws. Finding them in an extended Stainless steel and lengths with a nice domed head has never been easy until I contacted Wyatts outdoors (www.wyattsoutdoor.com). These screws are of excellent quality. While we were at it I installed one of their followers as well. 


All things considered the project came out pretty well and the owners plans to cross stack a pile of eastern management deer with it in the near future.


Sunday, August 26, 2018

The End Game


It is often asked of all of us regardless of profession "is the job complete to your satisfaction"?" it's a good question and the answer can be a bit slippery at times to pin down. In many disciplines finishing up a project requires attention to detail and quite often a dogged tenacity to stay focused in the final stretch. The saying "it ain't over till it's over" sums it up pretty well in this profession.

Last week I received a barreled action from Glenrock Blue (glenrockblue@gmail.com) which they had just caustic blued per my request. This is one of the very few operations in my shop that I do not in house. While I do rust blue myself when required I have preferred caustic blueing to any other final metal application for all my carbon steel magazine rifles regardless of the current available alternatives.

On the day of final assembly the bench top is cleared of clutter, the door is locked and the phone unplugged even after all these years. The parts are then pulled from the shipping box, unwrapped and each one accounted for. With a standard scope sighted Legend or Classic there are usually 58 to 60 blued parts.


As the Legend is based on Model 70 the tools required for the final assembly are gathered up. The order of assembly is simple, I just grab the closest part. If I reach for the bolt sleeve the safety wing, main spring and firing pin will soon follow. The bolt body might be next and can be handled in a number of ways. I prefer to leave the bolt body blued on both Classics and Legends for rust prevention in the field. Some clients prefer the bolt body to be polished bright and some prefer the look of a jeweled bolt body. If the bolt body is to be jeweled the fixture and tooling quickly put to use.

The bolt body is then cleaned meticulously to insure no abrasive material is left on or it the bolt body. I say this as this seems to be a forgotten task in some shops. I recently returned from an Alaskan Bear hunt where I witnessed a rifle made inoperable due to crud left in the bolt body. 

Next the extractor, gas block and collar are secured in place, the cocking cams greased with a light coat of anti seize grease and the sleeve and firing pin turned into place. Then the trigger and its adjustments screws are spun together.


Then I might grab the follower. Like the bolt body I prefer to leave it blued, however many clients prefer to have the top flat, the side of the 60 degree standing wall and the bottom flat polished so they can easily read the 4-CTGS engraved on the followers bottom shelf. Two Delrin "bumpers" are press fit into the front and rear of the follower to negate any possible dimpling to the already heat treated magazine box while the rifle is in recoil.


The action might be next. A threaded stub is installed in the action so it can be held in a variety of angles by the bench vise to allow me to remove the bluing from the bullet ramp. Masking tape is applied anywhere that I don't want to scuff blued steel. Being careful works 90% of time, the tape saves your ass 100% of the time. When the ramp is cleaned up any polishing residue is completely removed and only then is the barrel reinstalled. This does require some finesse. The appropriate sized aluminum bushing and one standard thickness business card will go between the bushing and barrel. Care must be taken to slide the barrel into the bushing as well as the vise without touching either the bushing or the vise or the barrel might be going back to be re-blued. As I have mentioned in earlier post I currently use a barrel vise designed and sold by Jerry A. Fisher.

With the barrel snugged tightly in the vise I then roll the action onto the barrel threads to within a single revolution of the thread extensions shoulder. If your using a in-line action wrench the wrench is slipped into the action and a 3/4" socket wrench seals the deal as the action is rotated into place with the proper inch pounds. Previously I would use an "over the action" style wrench carefully slipped over the action and a business card shim was placed between the bottom flat behind the recoil lug and the top side of the front ring on the action and then snugged into place. In this case extreme care must be taken not to bang the action with the OD style wrench.

With the barrel installed the ejector, sear, trigger and accompanying coil springs are placed in the appropriate cavities. The over travel and weight of pull are temporarily set.

The stock is now addressed. So whatever minimal work still needs to be done to the stock such as wiping the grime off the recoil pad, giving the stocks exterior two coats of Armor-All and then spinning the swivel studs in place is completed.

With the barreled action and magazine box being held upside down in a padded vise the stock is then positioned over the barreled and lowered into place. The floor-plate assembly and bow are returned to the stock and tightened down to the appropriate inch pounds and the magazine spring and follower installed in turn.

The rifle is now rotated 180 degrees and the scope mounts are now screwed into place using five 8x40 Torx head screws. The installation is done quickly and accurately with the appropriate diameter alignment tube. We're now ready for glass.

At this point I might install the clients scope back into the rings and take a few pics to be sent at the end of the day to allow the client to see the progress.  But for now one of two test scopes come out of the safe and get tightened into the rings as now it's time to go back to the range for a 2rd time during the rifles construction. The barrel had to have shown some accuracy potential when it was shot after the stock was installed and the scope mounts made,


If accuracy at that stage was a bit dicey further shooting would have been required to determine if that barrel was going to stay in place or wind up a tomato stake, a rare occurrence but can happen. The clients scope is also installed to make sure it's working properly. This is the stage to catch any potential accuracy or optical issue, not after the final assembly is done. I use the test scopes to eliminate any new scopes issues right from the start by shooting the clients scope as well at this point.

This shooting is done with know accuracy hand-loads at first as I want to know what the rifle is capable of to my satisfaction. The test scopes are both fixed power one a 12X and the other a 16X. I don't want to use a scope greater than 16X especially if the client is going to using a typical 2.5-15 power scope for actual hunting. I want his groups to at least resemble mine when he receives the rifle and shoots the same ammunition.


While shooting the rifle I make mental notes of any possible tweak I may need to make and there will ALWAYS BE SOME. The trigger pull may be breaking to light or to heavy, the extractor may need some adjustment. The feeding is checked with a full magazine as the rifle is fired over and over again.
Back in the shop the barreled action will come back out of the stock, adjustments made and additional hand-loads put together if necessary.


These are tried at the range a 3rd time and all the working systems that got tweaked are again reassessed. Now if the rifle is shooting to my standards with my hand-loads and the client wants to use factory ammunition its time to shoot the factory ammo. If chambered for a 30-06, 7mm Rem, 300 Win or 375 H&H a fairly good cross section of ammo can be gathered up and tested. When all is going well the barrel will shoot accurately enough for any big game hunt in the back forty or on the other side of the globe. Granted 416's don't need to shoot 3/4" groups while a 7mm or 30 caliber really should if at all possible.


However if the rifle is chambered for a heavy caliber and doesn't like the first rounds tested then the testing can become rather expensive very quickly. Loaded with Premium bullets the cost can be as high as $150.00 per box of twenty. If that barrel doesn't like that flavor of ammo ! Well we move onto the next box that only cost us $130.00. Sooner or later we hope to find a factory load that fits the requirements. If you hope to have a solid and soft shoot into the same point of impact at 100 yards good luck chum as things might get grim before they get better.


When the accuracy standards have been established with the factory ammunition then its time to remove the test scope and install the clients scope if you have it in tow. If not your headed back to the range yet a 4th time. The clients scope is now installed and shot for effect. If the stars are aligned properly in an optical sense we're won and done. With the rifle and clients scope zeroed the bore properly cleaned one last time.


But we're not done yet, "holy crap" you say "how long are we going to drag this out ? " as long as it takes Gumby. During the final assembly you had better be sure you haven't added any new "Hammer Tracks" to the package and if so any corrections need to be made before we tie a bow on it.

Now it's got to be packaged for delivery. Not a wham bam thank you ma'm affair as I'm not at all interested in filing a damage claim with the carrier. It's got to be done right, which is why I prefer to use either a Pelican or Storm case and cut the middle sleeve for the outline of the rifle and scope. Once encased in the Pelican/Storm the case is Zip-Tied and locked, slid into a cardboard sleeve and sealed up. Pictures are taken during the final packaging in case any questions or claim questions come up due to possible damage in transit. To date this has never been an issue. Then we deal with the carrier labeling, insurance, pick up, etc.


It's a happy moment when the carrier arrives, gathers up the boxed rifle and drives off into the sunset.

I am tired out already and it's only Tuesday.


Sunday, August 5, 2018

Pics from the field


Here are a few pics from the field that have been saved for a day like to day.

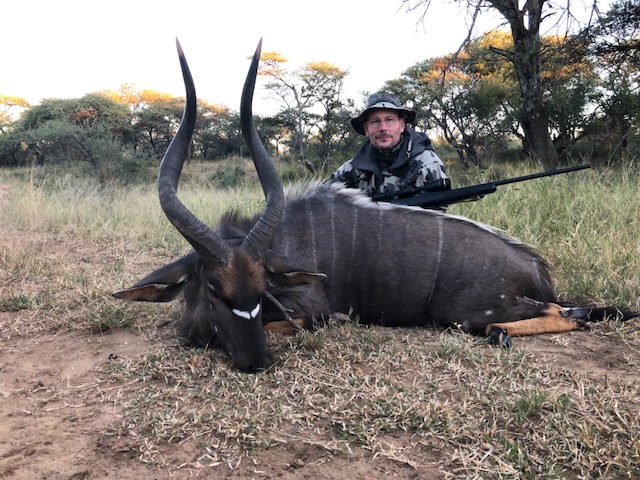
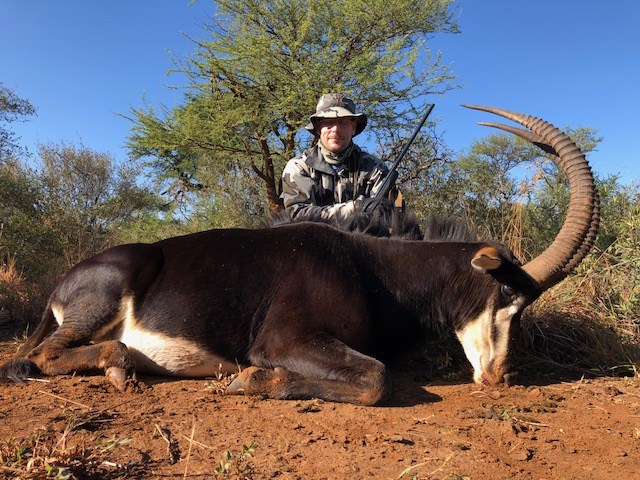
Below is a Pronghorn buck from Wyoming's Red Desert that Terry shot with his 300 H&H Legend. Then Botswana offered up an excellent plains game hunting opportunity so he traveled to Bots and rolled the dice. Having always been a bit of a Spiral Horned junkie he had been looking for a Kudu and Eland hunt in this country for a number of years. Even late in the season, under intense sun and heat he and a friend were not disappointed.


Ben traveled back across the big blue to hunt with an old friend of mine PH John Oosthuizen of Hunters and Guides (hunters@huntersandguides.co.za). Using his Legend 300 Winchester Magnum John and Ben made the best out of their allotted time together and conjured some memories. 


Bret and I hunted in Kansas together this last fall and while Bret is patiently waiting another DE & Co rifle to replace the one that was stolen on an overseas hunt I just had to include this Whitetail Buck he killed even if it wasn't taken with a rifle I had assembled. We were hunting at the invitation of another good friend of my mine that will allow hunting on his property on every other Blue Moon that occurs. Bret shot the buck of a lifetime the second morning of the trip. The buck was known to be in the area and had been seen and photographed all summer and fall on and off the property. The three of us had a plan to try and hunt this buck at the exclusion of any other buck and all the pieces fell into the puzzle. No high fences, no supplemental feeding program, no jive, this buck was as wild as they come. 


I spent the next 8 days passing up one buck after the other looking for just the right mature buck and had the safety off more than once before finally settled on killing a big mature doe to take home for the freezer. I hope to go back to Kansas as soon as there's another Blue Moon.


Monday, July 16, 2018

Monday, June 25, 2018

Test Driving The Woodleigh Hydro Bullet


This post is shallow, I clearly admit it. Hardly anything resembling accumulated data with only 6 shots fired from a 375 H&H I had recently completed. Nothing exhaustive, and no reams of targets to offer up anything empirical. But the introductory results are impressive and if they are indicative of the Woodleigh Hydro accuracy potential I will be trying more of them. From what I've read other's are seeing the same results. Most of the reviews of this bullet are coming for Australia which is understandable as it was conceived in OZ. I have used conventional Woodleigh softs and solids for a very long time. The woodleigh FMJ's having been the favorite for many of the heavy caliber rifles I have assembled. So when the Hydro first appeared I watched from the sidelines with interest.

I had noticed only recently that Federal had been loading and now MIGHT discontinue loading this projectile for their line. So few places to really use a specialized projectile here in the states. One can understand if the bean counters at Federal had tallied up the sales then pulled this load off the line when the sales showed no promise. I tried to buy a box of this Federal load to shoot in this 375 but could not find a retailer or dealer that still had them in stock. I finally called Huntington's and Fred sent me a box of bullets to hand load.

It was a very small box to, containing only 20 Hydro's. The price was steep, but few jewels are ever inexpensive. For the sake of science I sat down at my loading and started sizing some cases.

Comparing the length of a 300gr Hydro to a 300gr TSX you will find the Hydro is slightly longer. Case capacity comes into play with many mono bullets. Fortunately this rifle shot extremely well with H-4895 when under the TSX so I decided to try the Hydro with the same powder ? This particular powder charge came right up to the base of the Hydro. Perfect !

                                                                                    Typical 3 shot group fired with the 300gr TSX


As I was still doing the final load development for this 375 and I was hopeful these 2 Hydro's loads would show some promise. Having shot thousands of Woodleigh's for decades I settled in behind the rifle with a certain amount of confidence.


I noted the 1st point of impact, slid back into position and sent the 2nd bullet down range. When I recovered from recoil and looked through the S&B I did a double take. Hmmm! then confirmed the impact with my spotting scope. It could it have been a fluke? so I sent the 3rd round down range.

Looking again through the ocular lens I started feeling all warm and clammy. I decided to walk down and mark the target. My, my lets see if I can do that again, and I did.


This 2nd group was fired with 1 more grain of powder with the same results. So what this tells me is that I will be trying these Hydros again and soon. It was evident to me that the bullets original meplat design would reliably feed even before the nose cap had been engineered. The current capped version fed just as well as or better than any Spitzer soft point I'd run through the gun as it was being built.

If you read the fine print on the Woodleigh website the Hydro was designed to perform as both a hybrid Soft Point and Solid that penetrates into next Wednesday. Maybe they said it in a more scientific and eloquent way but that seems to be the idea. If you can get by using one bullet to cover Impala, Sable, Eland, Buffalo, Hippo and Ele's on the same hunt I can see the benefits big time. Is it a Cat bullet?????? well maybe not in the traditional sense but !!!!!! Is it the one bullet answer ? for some perhaps it is.

More will be ordered, more will be shot, notes and an opinion will evolve, so far my limited exposure to the Hydro has left me with a good impression.

Sunday, June 24, 2018

Sack It And Pack It It's Well Worth The Effort


The next time you'r getting set to fly to a hunting destination you might want to consider how you pack some of your duffel. Until you've used a couple different sized stuff sacks or your day pack as a rifle rest you just haven't been living right. Crammed with socks, underwear or any other clothing items you now have all that is necessary to confidently confirm the zero on your rifle when you land at your destination.

We've all seen the drill when you're asked to check the zero on your rifle and ushered down to the river bed or similar location. Some camps are equipped with pretty nice shooting benches, some even have a mechanical front and rear bag rest. In the amount of hunting I have done that required flight to these destinations I have encountered these amenities only twice. One of these was during the latter part of last May. The other time was in the early 90's

Consider yourself lucky if there is at least be table top, the hood of a truck, or sizable flat topped rock that will allow you to kneel behind it and use you pack and stuff sacks as a rest. Sometimes it's just a dry river bed or a tree to lean against. In the case of the latter two you had better been shooting your rifle on your local range prone, over your pack and wrapped up in your sling long before you're wheels up and heading off on that hunt of a lifetime. As this should give you a rational idea of what you can expect from YOU in regard the type of accuracy you should expect to confirm your point of impact under those more realistic field conditions. What a novel concept !

Again if there's a shooting bench complete with a rest when you arrive, lucky you. But what if the rest itself is fairly high and the seat fairly low and you stand 5' 2" flat footed ? I could go on and on about the variables but you do need to check that zero. I tend to believe that when a rifle is placed in the baggage hold, taken to 35,000 ft then subjected to -25 temps within that hold for up to 16 hours that the dissimilar materials that make up the erectors system in any scope can very possibly and probably move, i.e shift your point of impact while in transit, call me skeptic if you want.

Hopefully over the years you've laid in several stuff sacks in a variety of sizes. The one covering your sleeping bag is a perfect example. Others of smaller diameter will be relegated to rain gear, gloves and hats any combination of kit.


One stuffed sack should give you the approximate height of the for-end rest you use at home. My rest allows the fore-end to bottom out on the sand bag approximately 6-1/2" above flat surface of a bench top typically. A sleeping bag in a stuff sack often times is about that diameter.


Or a combination of 2 bags can serve the same purpose and allow more height latitude on site. As will cradling the fore-end in your palm which is what you'd want to be doing with any heavy caliber.


The average height of my rear rest is approximately 4" at the leading edge and bottom of the bunny ears. Once again find and fill a stuff sack to meet that need before you get on the plane.


Then we have the issue of targets. In some camps your target might be a cardboard food box, maybe stump with an empty bean can sitting on it, perhaps a paper plate with a hand drawn sharpie center or my all time favorite a blaze hacked into a tree with a panga.


If you like shooting at Orange dots, no problem, how about diamond shapes or squares ? Let me ask you just how heavy are two of your favorite targets images placed in your duffle? While we're at it also toss in 8 push pins to anchor the target to that wet wooden back stop or cardboard box if you're lucky enough to have these. With the increasing use of come-up turrets it would be nice to confirm where your Zero point of impact should land on the target by marking a target ahead of time. Note the target on the left and the bullet holes cutting that line.

If you determined and packed these stuff sacks at home then your sight in session with your guide will be pretty seamless with very little drama. So what if you have to make a scope correction, ammo at this stage is cheap, always remember the cargo hold ?

Minimal shots fired with reasonably controlled conditions and we're ready to roll, no guessing in the heat of the moment.