Monday, September 30, 2013

The Final Stretch, Grip Layout

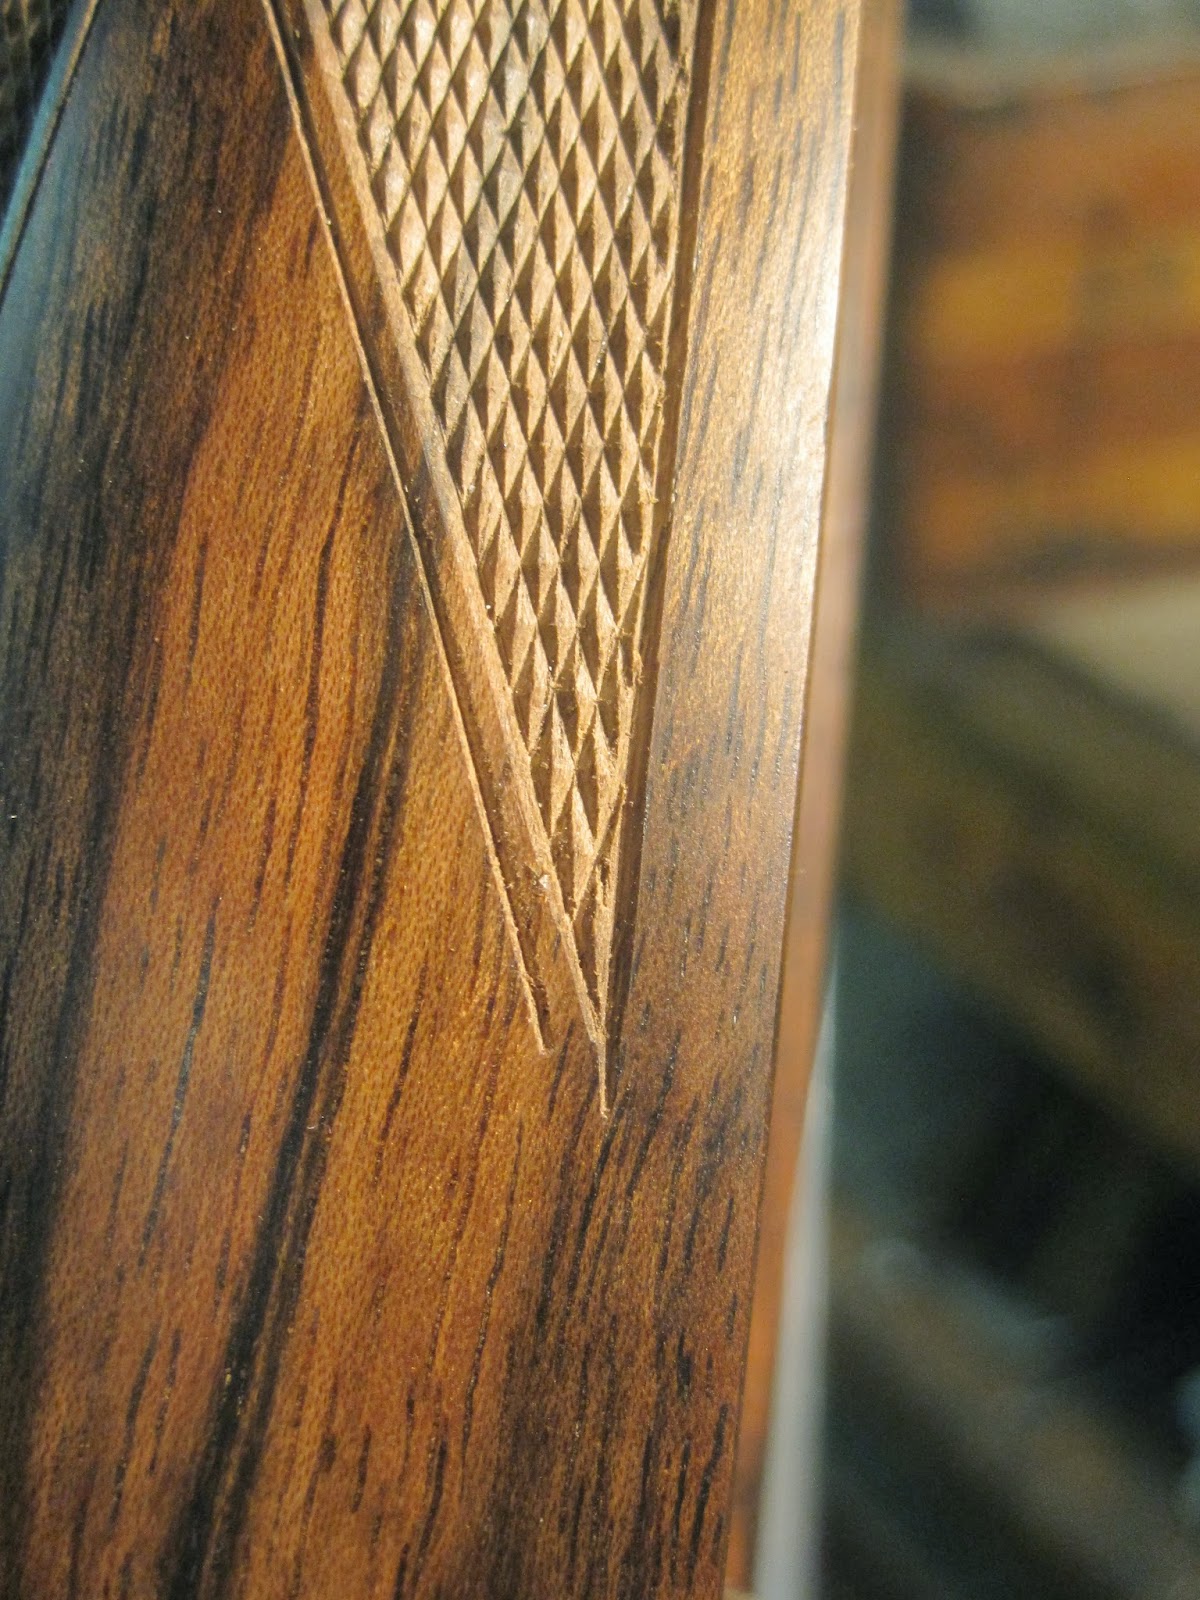
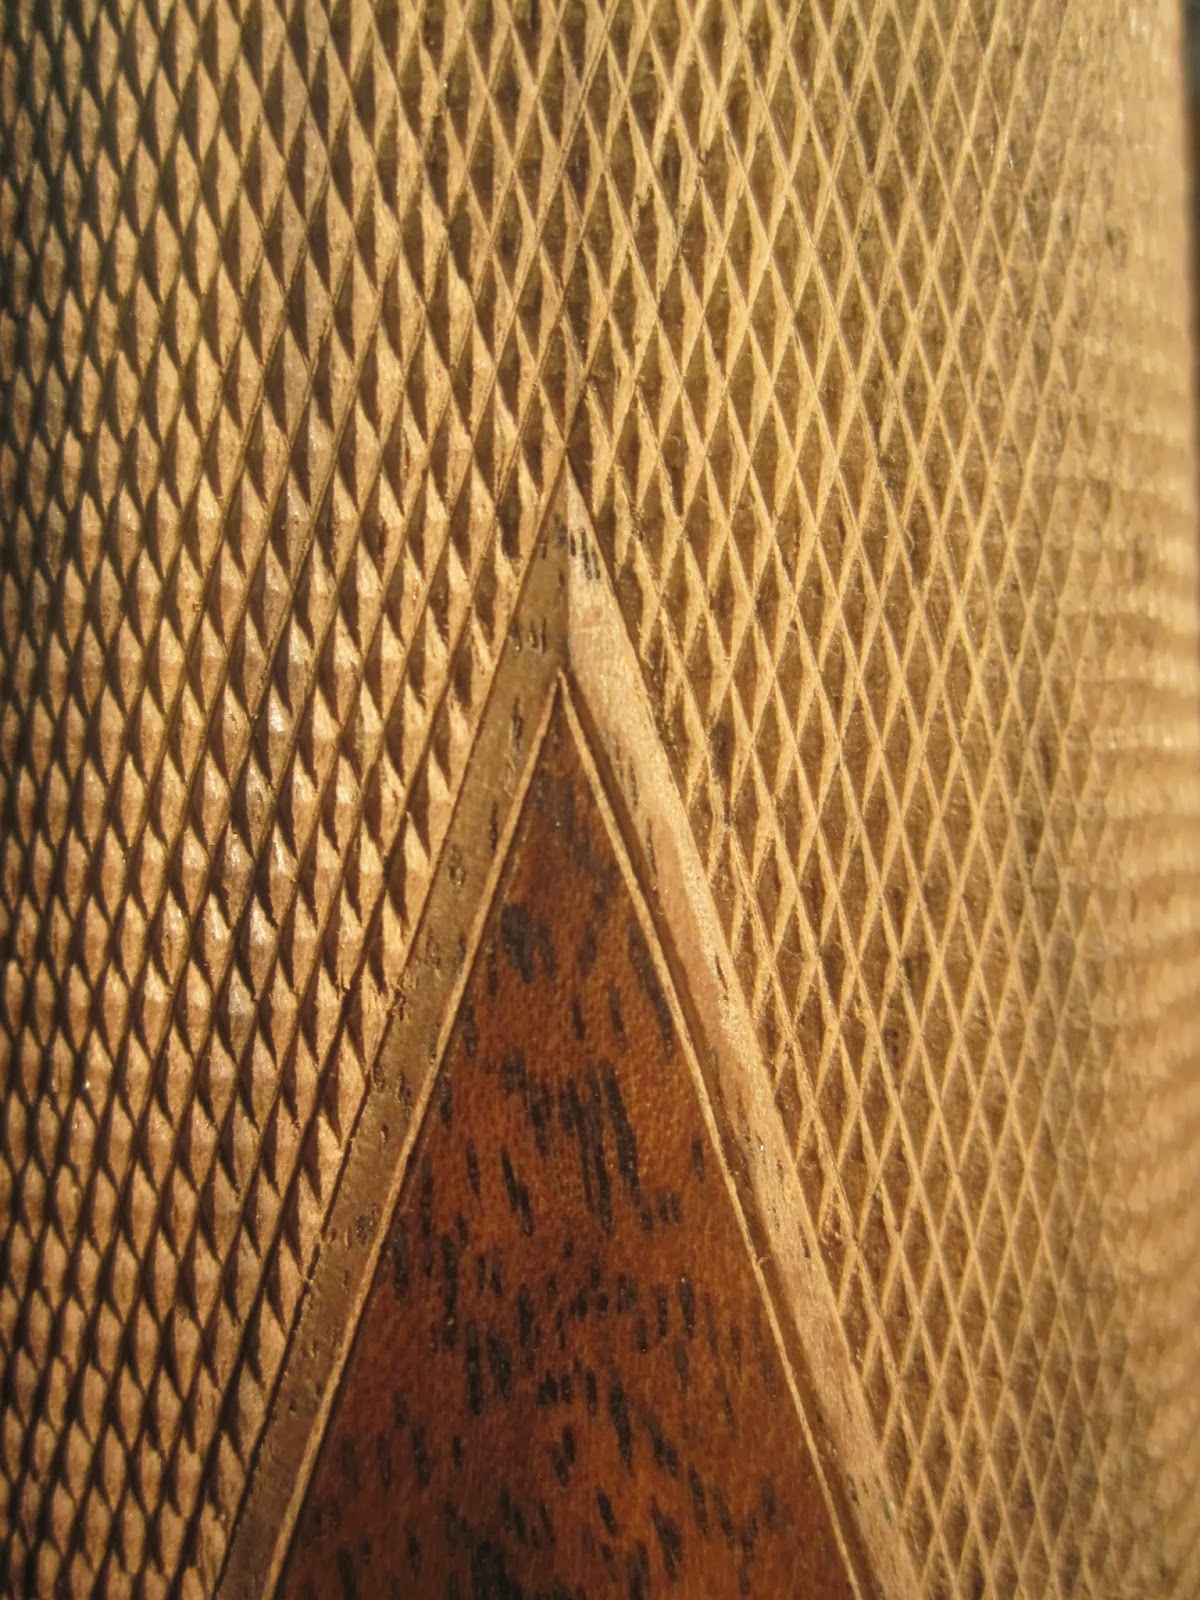
The layout of the checkering pattern for the pistol grip of any stock for me is fraught with "what if's". With a point pattern the master line layout from one side to the other dictates the whole composition and balance of the patterns final shape. Extreme care must be taken to insure the angle of the master line triangle is positioned in the same plane on both sides of the grip. I first lay out the border at the bottom of the pattern parallel to the grip cap flat. I then lay out the border that runs between the two panels from the leading edge of the grip cap to the back of the trigger guard. This line is first drawn in with a white pencil. When I have the two borders parallel I cut both lines in with a Japanese 70 degree veiner to about 1/4 depth. Then using a compass I establish the border around the tang and the radius on either side of the trigger bow. These curve's are then cut in with the veiner. Then I try to position the intersection of the master lines so this major intersection point lays visually in the center of the grip.

I always lay out the cheek piece side first so the rear tail of my point pattern allows for the termination of the cheek piece. To do otherwise is just asking for trouble as the end of your pattern may cut into the end of your cheek piece if done from the other side first. I cut in both master lines on both sides of the grip once I am happy with the looks and position of this intersection. I do not establish any other borders but rely on the lines to be cut in eventually to determine the end or border of the pattern. Like the forend I will lightly scribe in some reference lines to keep me honest as the lines wrap around the curves of the grip. Many people comment on how "straight" the lines appear on good checkering which I find quite comical. What you see in a good pattern is well spaced parallel lines that are then following a parabolic curve in most cases, straight? Not hardly. I also place two layers of tape on the back side of the grip panel to prevent any cutters from accidentally scratching the stock behind the pattern in this tight area.

I lay out both sides of the grip and then as with the forend establish the ends of the major points so their lengths are optically pleasing. Then I cut in the borders except for the shortest borders on the leading edge of the pattern, don't ask me why I save those for last as I'm not sure I could tell you. Then starting with the 75 degrees cutter I deepen the pattern on both sides with two passes. Once this is done I begin the final deepening with a 90 degree cutter. In tight corners I use a short corner cutter or the veiner. At this stage of the process I have 42.5 solid man hours in this checkering project and I'm are not done yet.


Tuesday, September 24, 2013

The Final Stretch, Finishing Up The Forend Checkering

Once all the lines in both directions are spaced I make sure the pattern as a whole looks balanced. I will add a line to extend the tail on one of the major points if it's to short, extend one of the top border lines to match it up with the corresponding border on the opposite side. The pattern must appear to be geometrically pleasing. The final lay out must be done with thought and care so as not to create more work than is necessary. When I'm satisfied with the overall pattern I then lay out and lightly cut in the borders.

The next step is to deepen the pattern and bring the diamonds up to points. I start with a 75 degree cutter and make at least 2 passes in both directions over the entire pattern. In the corners I use a short corner cutter and a V tool. Then I make two more passes using a 90 degree single line cutter. Care must be taken to stay in the track and not plow a line out of the groove and start another unwanted line. In the words of the late Len Brownell when you come the border of the pattern you "stop"the cutter to prevent over runs. Then I use a Super Fine 90 degree finish cutter to point up the pattern and make all the grooves appear to be the same depth.

The typical Mullered border uses a radial groove that lays between the main pattern and outermost line of the border. The Border I use I shamelessly borrowed from Monte Mandarino and Monte robbed it off and early Haenel stock. For me it was love at first sight. Some call it a Window Box effect, others a Shadow box, call it what you want it's not all that hard but does take more time to execute. I cut this border in on angle that drops away from the outer edge of the border and falls towards the base level of the diamonds. This is done with a narrow razor sharp chisel, a file and a set of dog foot chisels to establish the corners or tails of the points.

With the forend finished I move to the grip.


Sunday, September 22, 2013

The Final Stretch, Forend Layout

I am always glad to start the checkering on any project as the end is in sight. While I have owned and used two different MMC electric tools over the years for the layout. I never was happy with either and returned to using standard push hand tools. The MMC didn't seem to save me anytime and at least in my hands a mistake could happen in an instant that was difficult to repair or incorporate in the pattern. Today I generally checker 24 lines per inch and have an open point pattern I use 95% of the time that has a bordered perimeter.

I start the pattern by laying out the two top lines on either side of the forend. These need to be the exact same length and in the very same position. These are laid out with wooden jig and a dog leg scribe. I  then use a 60 degree cutter to deepen these two boarders. Then using a piece of copy paper I have wrapped around the forend I mark the ends of both these freshly cut lines as accurately as possible with the paper immobile and very taught. I use this marked paper to give me the volume of the forend in the length of the pattern to be cut. I find and establish the centerline based on the forends volume and add a 3" to 1" set of master lines on this template and draw in the pattern I want to transfer to the stock. All the boarders are laid out on this paper template.

When I have the pattern exactly like I want it tape it to the stocks forend and transfer the pattern to the wood with a tiny prick punch. When the entire transfer is complete I remove the paper and using baby powder to highlight the pricked holes make sure all is well. Changing anything at this stage is very difficult so diligence and accuracy while making the paper pattern and in the transfer is very important. Using the same 60 degree cutter I cut in both master lines and begin cutting in the lines with both a 2 and a 3 line cutters that cut on the pull stroke. All the teeth are cutting teeth, I do not like the safe edge cutters. I will space 4 lines in a singular direction then reverse the stock 180 degrees and cut in 4 more lines from the opposite direction and on either side of the pattern. When I'm spacing the pattern I do so standing up otherwise I tend to allow my lines to drift if I'm sitting. I also layout lines parallel to the master lines around the forend to check from time to time to keep me in sync with the desired results. If my lines start drifting I make corrections at that time.


Friday, September 13, 2013

New Mexico Two Step Part 1

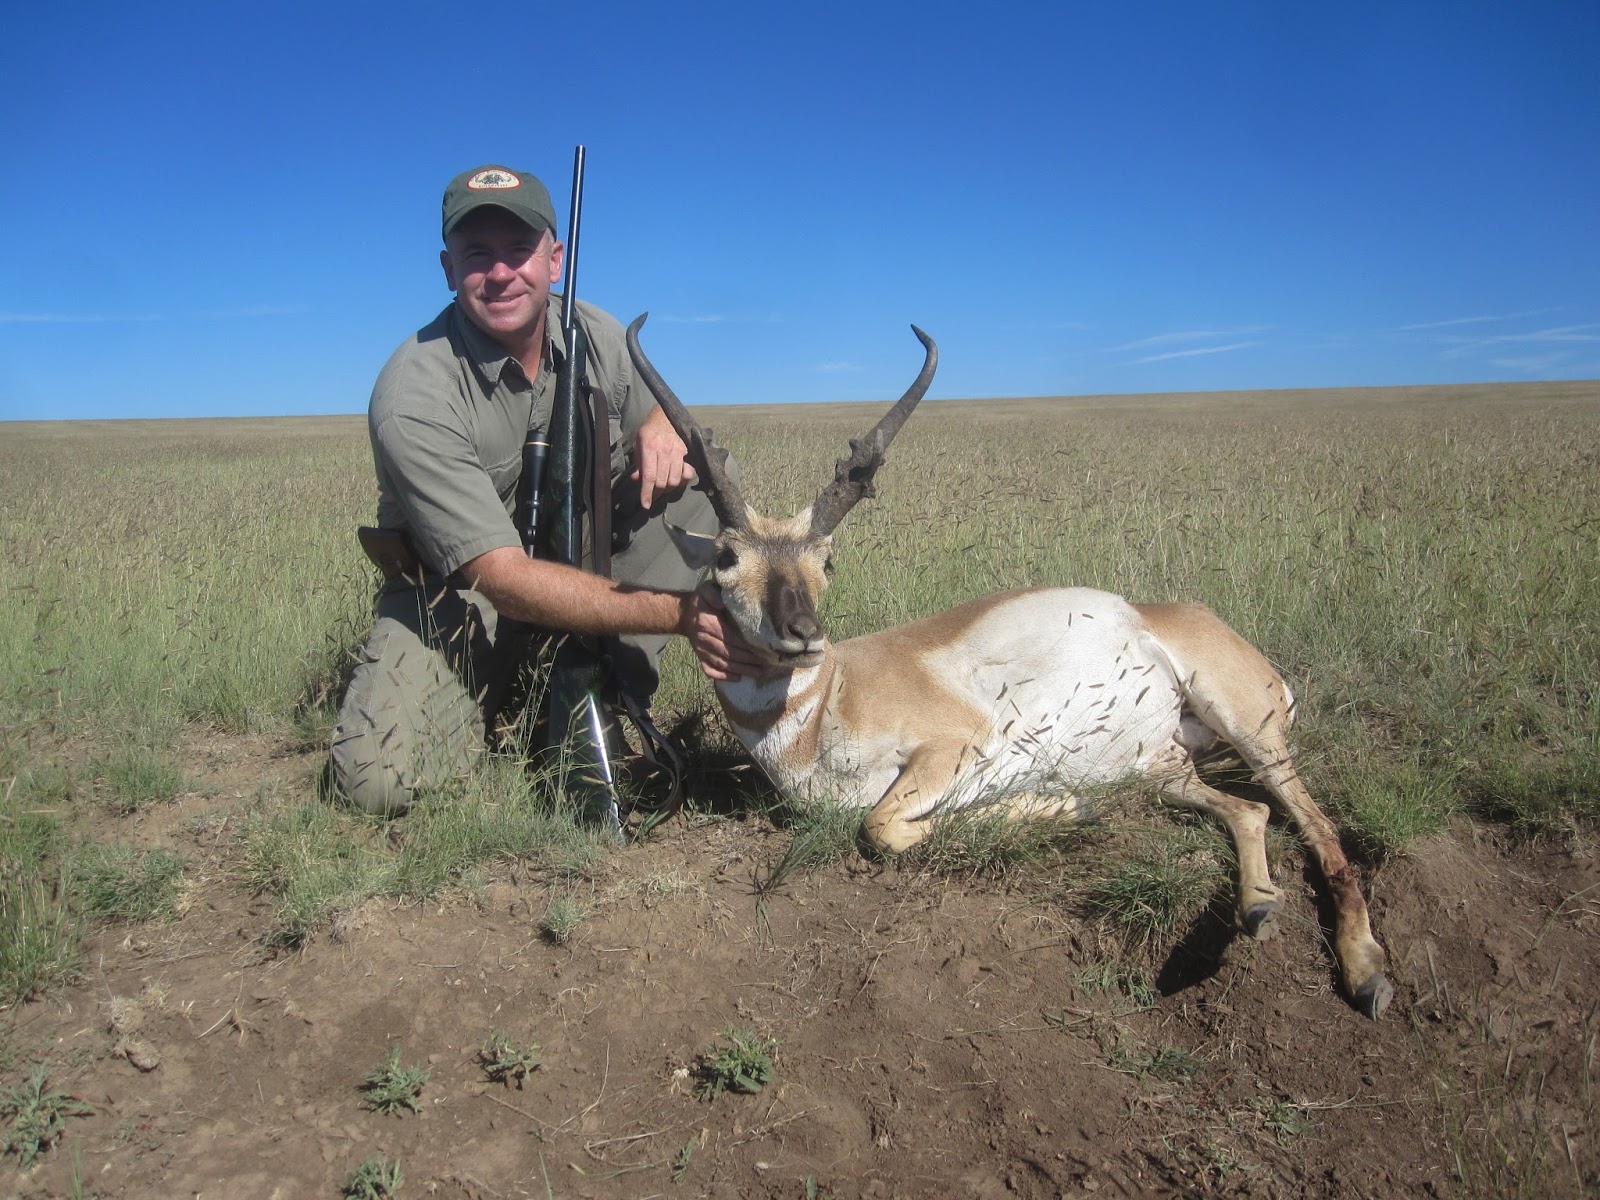
I have once again had the pleasure to guide 2 more Antelope hunts in New Mexico and as usual it was a grand time. The event took place on a ranch in the North Eastern part of the state that I have been guiding on for many years. The hunt was arranged through Kim Bonnett owner of Bucks and Bulls based out of Lindon Utah (www.bucksandbulls.com). The first hunter to arrive was Grant Bledsoe and our mutual friend Gary Merrill tagged along as an observer. This was Grant's 3rd hunt on this ranch and Gary's 2nd time to insure crowd control. We spent the first 2 days of Grants 3 day season looking over many mature bucks. At close to 100,000 acres this selection process can take awhile. At dusk on the 2nd day we found a buck that Grant wanted to try and take and the stalk was on. We lost the buck as the sun set but felt he'd be same pasture at daylight. True to form we found the same buck right at dawn the next day. We watched the buck from roughly 1200 yards until he bedded down on a low ridge line that allowed him an unobstructed panoramic view of the short grass prairie and allowed us no topography to use as cover for a stalk. Gary suggested an air strike, Grant was looking up the number at Cheyenne Mountain, I decided to go deep and prepared to throw the bomb.

It was time to deploy the Trojan Cow. Both Gary and Grant gave me an instant fish-eye and the good natured ridicule began. Grant however has hunted with me before and has learned to unclip the leash and let me run so he grabbed one side of the bovine silhouette and did his best to bite his lip and endure the laughter coming from Gary as we "grazed" towards the bedded buck. We covered about 1000 yards in 45 minutes. The buck finally stood up as I moved Bessie away from Grant to allow him a prone 223 yard shot. I haven't heard anymore disparaging remarks about the flat cow since the buck hit the ground.

Grant was using what was to become the first real prototype Legend. Made on a Left Handed Remington 700 and chambered for 280 Remington this rifle has traveled the world and has always delivered when called upon. After very little load development Grant settled on a load of IMR-7828 and a Swift 160gr A-Frame. Grizzlies, Sheep, Moose, Leopard, Elk, Waterbuck, Kudu, Sable, herds of Impala, etc have fallen to this rifle. This was Grant's 3rd Record class antelope taken on this ranch with me and they all look quite different. This one carries 19 extra points around the prongs on both horns giving mass a whole new definition.


Tuesday, August 20, 2013

Midnight Sun And Sweat

Chet Fitzgerald just returned from Alaska's Talkeetna Range a bit sore, a bit weathered, but with a sense of honest hard earned accomplishment. His backpack sheep hunt was booked with Master Guide Braun Kopsack and guided by Tim Brannon. The pair put in their best effort into to play for eight days and on the last full day spotted this ram nine miles from their pick up point. They put him to bed and then covered five more miles to get within 350 yards of the sleeping ram. When the ram finally stood up Chet placed the reticle of his fixed 6X Leupold on the rams back and sent one 130gr TSX from his Legend 270 Winchester (the late Allen Day's old Legend) towards the ram and ended another successful sheep hunt. A hunt such as this is driven by a desire to cat walk in the scree, be bathed in rain and tested to your limits. Well done Chet


Thursday, July 11, 2013

Rich is put through the paces

Rich purchased a previously owned Legend Long Range from us a few months ago. As usual we forwarded him all our text in regard to hand-loading and utilizing a rifle made in this configuration. Having spent the majority of his hunting career in the heavily wooded forest of the East he had more than a few questions as to how to begin loading for this rifle as his hand-loading experience was just as limited. It was then we learned he had also been invited to participate in the Lander Wyoming One Shot Antelope Hunt in late September. As time was short I encouraged him to fly to Utah and spend 4 days learning to load for and shoot this new rifle under the conditions imposed by the rules of the One Shot hunt. The use of a bipod, shooting sticks, slings etc are not allowed, we no doubt had our work cut out for us.

We began with the basics of loading and shooting the 1st afternoon. His first shots were done strictly from the bench top off a Hart rest and bunny ears to become familiar with the rifle. The first groups could described as random at best. Whenever he shanked a round he'd shake his head, smile and asked for another round. He rapidly learned to call these shots and correct his mistakes. As his shooting improved we confirmed the accuracy of the loads and made sure the Leupold B&C reticle was working as designed at 100, 200 and 300 yards. Then I pulled him off the concrete bench and had him begin shooting prone off the Hart rest at 300 yards. Then we removed the Hart rest altogether and he shot only off his palm resting over a wooden block to try and simulate field conditions. The learning curve was vertical and not very pretty at first but his perseverance began to pay off. The days began at 6am and ended at dusk. By the end of his stay his shoulder was a bit tender but he was very comfortable with the rifle and his newly found abilities.  Shooting prone with the rifle laid over a jacket, badger mound or rock pile any Lander Antelope is in for a world of grief out to 300 yards this September.


Having arrived with an open mind and being a fast study we covered a lot of ground and stuck with the program despite the 90 plus degree temperatures and evening storms. While here he purchased a second Legend that became available and he shot this rifle along with the first. We will keep you informed as to how the hunt in Wyoming plays out this fall.


Sunday, June 23, 2013

Stainless Steel Legend Long Range

We have just about completed another stainless steel Legend. This one is chambered for 300 Winchester magnum and made in our Long Range configuration. The only parts that are not stainless on this rifle are some chrome-moly scope base screws, the trigger pivot pin, the guard screws and the swivel studs. I have yet to find a source for swivel studs and a decent magazine spring made from stainless steel. After the photos were take by Kevin Dilly of Klik Photography the rifle was disassembled once again and these few parts were sent off to Robar to be NP-3 Plus coated and the magazine spring sent to Birdsong's to be coated with Black-T. These parts are supposed to be back in the shop by the end of this week and the assembly will be completed for the last time. This 24" Tim North barrel is also fit with a Clay Spencer Brake per the clients request. Coupled with an over all scoped and loaded weight of close to 10lbs it is pleasure to shoot. Once completed the rifle will then go through some load development by request and then shipped to the front range of Montana.

This Legend is also heading to Tajikistan on a Marco Polo hunt later this fall. We will file a hunt report when one becomes available.