We had discussed the project before it was due to arrive, as Dewey was trying to give me any advantage he could think of to aid in the duplication process. At the last moment he epoxied struts, well fins, no perhaps girders would be a better term to the underside of the stock to reinforce the trigger plate area. Thank goodness he did as it added a substantial amount of support to a rather lean trigger plate and knuckle area. Once the metal was inlet the strength in that area would be more than adequate with the fins removed we just had to get it to that stage.
The rest of the metalwork was made up with an extended top strap and trigger guard that terminated into the grip cap. There was no excess wood to be found anywhere in the design.
The pattern prep alone was a work of art both inside and out. Detail sanded then primer painted to give the maker a true visual of what he had envisioned, The interior surfaces glass bedded perfectly. So now the question was how to best hold and support the pattern and blank being machined ? That approach took a couple days to evolve.
For the first day I laid the pattern on my bench and eyed it cautiously every so often as if it was a sleeping rattlesnake. The second afternoon it came home with me in a heavy canvas sack tied snug at the top, I wasn't taking any chances.
I finally decided on what type of attachment I wanted to use to anchor the front center into the pattern that not only allowed rigid support but also access for my stylists and cutters to as much surface area as was possible. This would give Dewey a reference or datum in the very same area that would now be occupied by this center. Dewey reminded me more than once about some pesky little recoil shoulder that was about to be buried under my blocks that he was worried about. Clearly he needed some vacation time.
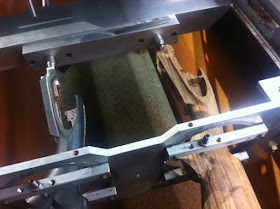
Fitting the blocks took a number of hours. Made from 2 parts that sandwiched the forward end of the stock and then tied together with three apposing 10x32 Allen screws. Once fabricated and installed a couple times this space age beaver trap was glassed together making it virtually integral with the pattern.
24 hours later the epoxy had cured. I poked it with a stick and nothing moved, always a good sign. The set-up was now ready to test drive and so I roughed the stocks exterior. As this phase places the greatest amount of stress on the stock and pattern I'd know pretty quick if this lash up had any promise.
Once I had the stock cut an 1/8" oversize I removed it from the machine and let it hang over the weekend hoping any pent up demons would be released from the roughed blank. Then I indicated both the pattern and oversized blank into the rotary steady-rest system. The rigidity for both was now significantly increased, so far so good. Slowly I began to remove wood from the walnut blank by decreasing the size of the stylist in relation to the diameter of the cutter in use. His instructions said "cut to zero unless otherwise indicated". I cut to zero.
When the last walnut chip hit the floor I exhaled for the 1st time in 24 hours. Before removing the stock and pattern from the machine I measured everything I could with my calipers, gage blocks and pins. Satisfied the stock came out of the machine and the next day was on its way back to Dewey to be inlet.
This project was without any doubt the most challenging stock duplication I have ever attempted.
Once again skill and daring has overcome fear and uncertainty. Now to finish up machining that lowly Boss stock.


